...
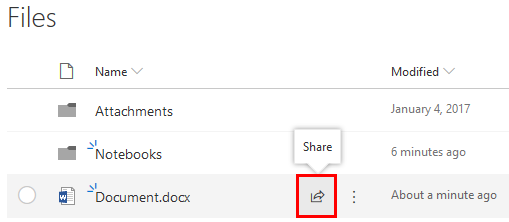
To share the document, hover over the document, and then click the Share icon.

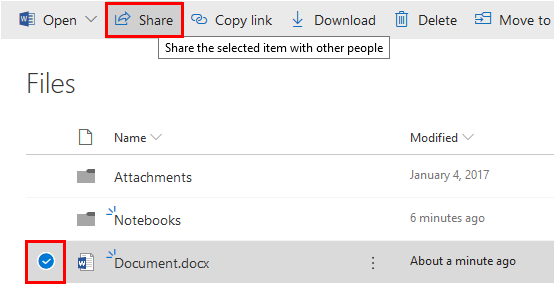
Or, you can check the dot next to the document name(s), and click Share from the toolbar above.

Modify the settings as you see fit for individuals who need permission and what types of permissions they have.
Click the permission box:


Select who you would like to share the file with. For people inside the OTC organization, you can just start typing names and it will try to find that user in the same address book you use to select contacts from in Outlook and Teams, but you can also put addresses from outside the organization, such as people you work with at other companies or colleges, and even private users like Gmail users.
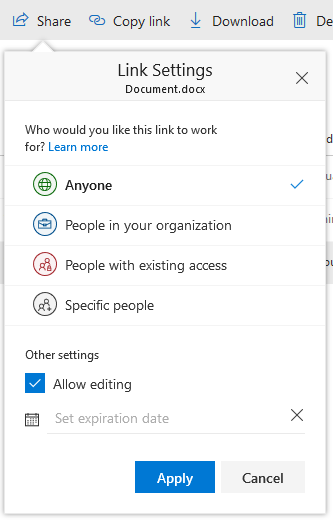
For example, if you only want to share the file with a specific person, you would select Specific people. If you only want them to be able to view the file, but not edit it, you can uncheck Allow editing.
Click Apply.
If you are specifying individuals who you want to have access to the file, enter their name(s) or email address(es), and click Send.
Once you share the file, the person you shared it with will receive an email with a link to the file, and it will also show up on their OneDrive under Shared With Me.
The documents will be edited with the cloud-based version of the application (Word, Excel, etc...) and automatically re-saved to your OneDrive share. Multiple individuals can also edit the same document simultaneously.
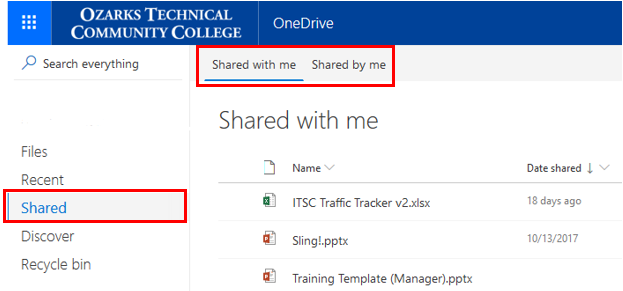
To view your shared files, click Shared. You can see Shared with me or Shared by me.
...